
 EN
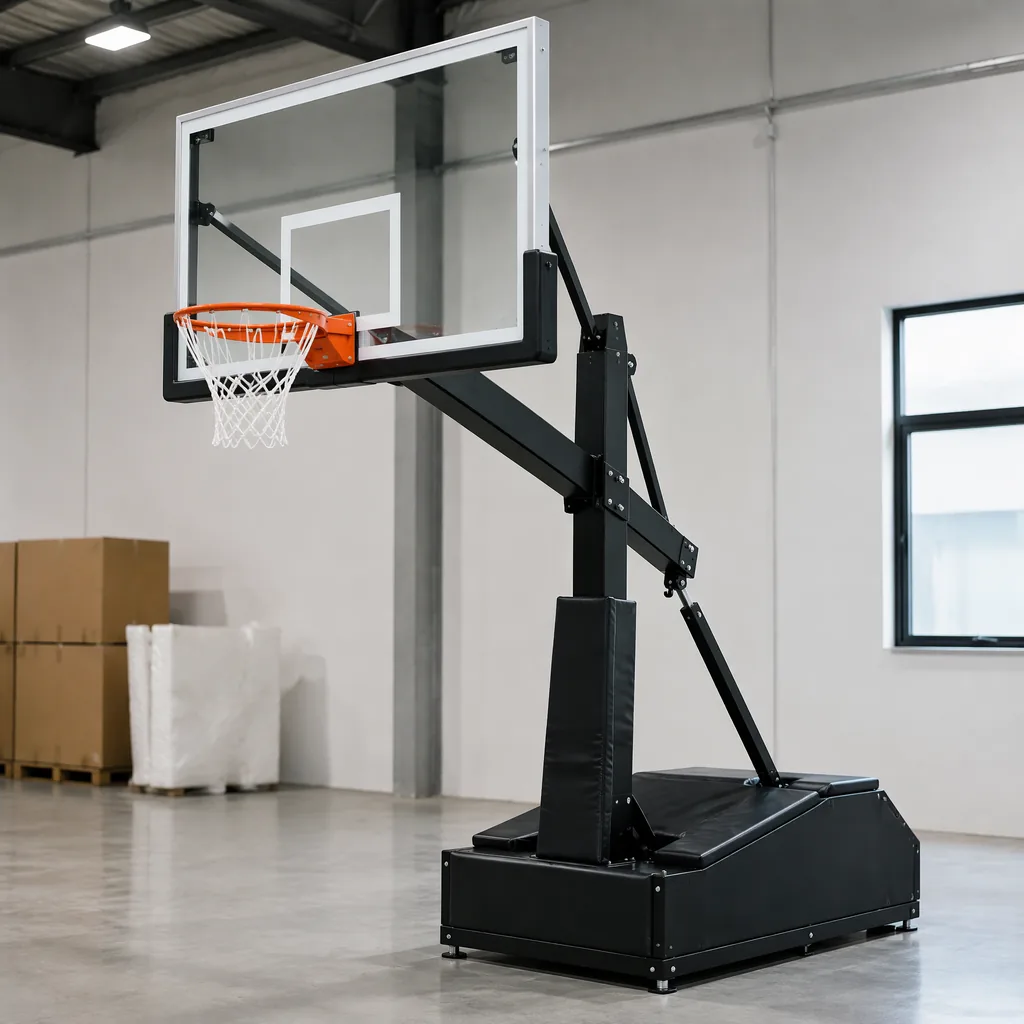
Basketball Stand Inspection: Stability and Safety Checks
A practical basketball stand inspection should confirm more than appearance. Buyers need evidence that the complete system remains stable, that load-bearing joints are correctly made, and that the backboard, rim, base, anchors, padding, and hardware work together as specified. A stand can look attractive in a catalog photograph while still having loose fasteners, weak welds, insufficient base support, or packaging damage. For schools, clubs, public courts, and facility distributors, inspection turns a safety-sensitive purchase into a documented release decision.
Before sampling begins, define the intended installation and use. Record whether the stand is portable, in-ground, wall-mounted, or ceiling-supported; whether the court is indoor or outdoor; who will install it; and how frequently it will be moved or adjusted. A clear basketball stand inspection plan gives the factory, purchasing team, installer, and final user the same acceptance reference.
Start with the approved configuration
Gather the approved drawing, product specification, purchase order, assembly instructions, artwork or labels, packaging plan, and physical reference sample. Confirm the stand type, backboard material and dimensions, rim specification, support-arm geometry, adjustment range, base design, wheels or anchors, padding, fasteners, and accessory list. If the order contains several configurations, inspect each version separately rather than assuming that one sample represents every model.
Record the product code, production batch, carton number, sample number, and inspection date. The reference should state what is critical to safety and what is cosmetic. This prevents a minor paint mark from receiving the same treatment as a cracked backboard, incomplete weld, missing anchor, or unstable base. Keep the approved configuration attached to the inspection record so later repeat orders can be compared against the same version.
For procurement teams, the basketball stand inspection should connect the drawing review to a documented sample check. Confirm the acceptance points before production, then compare the delivered unit with the approved configuration rather than relying on a supplier statement alone.
Check base stability and installation points
Stability begins at the base. For a portable stand, inspect the base shape, ballast compartment, fill opening, wheels, locks, handle, connection points, and contact with the floor. Confirm that the base does not rock on a level surface and that movement components engage correctly. If ballast is required, verify the specified filling method and check that caps or covers close securely after filling.
For an in-ground or fixed system, compare foundation dimensions, anchor bolts, plates, sleeves, and installation clearances with the approved drawing. Check bolt threads, hole positions, welds, and protective treatment around the anchor area. Do not approve a fixed unit only because the upright appears straight; the installation interface must also support accurate alignment and safe tightening. A complete basketball stand inspection should record measurements and photographs for the base and connection points.
The inspection workflow should follow the load path from the base through the upright and support arm to the backboard and rim. At each step, record the measurement, test condition, result, and corrective action so purchasing and quality teams can make the same release decision.
Review the frame, welds, and fasteners
Inspect the upright, support arm, braces, adjustment mechanism, and backboard frame as one load-bearing structure. Look for correct tube dimensions, straight members, sound weld continuity, reinforcement plates, clean transitions, and properly seated fasteners. Welds should not show obvious cracks, open ends, excessive spatter, undercut, or incomplete coverage. Sharp edges and exposed threads should be removed or protected where users or installers may contact them.
Check that bolts, nuts, washers, pins, locks, and adjustment handles match the specification and can be operated without abnormal resistance. A fastener may be present but still be the wrong length, grade, or locking type. Use the assembly instructions to verify the order of installation. During a basketball stand inspection, mark each connection as checked and identify any point that needs tightening, replacement, or reinspection.
Inspect the backboard, rim, and safety padding
Examine the backboard for correct material, dimensions, edge protection, holes, mounting points, surface damage, and alignment. Check for cracks, chips, cloudy areas, sharp corners, loose frame sections, or movement at the support connection. The target and markings should be positioned according to the approved specification, and any printed graphics should be clear and correctly registered.
Inspect the rim for roundness, welds, mounting plates, fasteners, finish, and connection stability. If the model includes a spring or flex mechanism, verify that it returns correctly and that no parts interfere with movement. Padding should fit without gaps, sharp edges, loose seams, or exposed hard corners. Safety padding is not a substitute for structural quality; it should complement a stable frame and correctly secured hardware.
Test movement, adjustment, and user contact
Operate every adjustment point using the method described in the instructions. Raise, lower, fold, lock, unlock, roll, or anchor the stand as applicable. Check that the system remains aligned after adjustment and that handles, pins, wheels, and locks do not release unexpectedly. For portable units, move the stand over the intended floor type and confirm that it can be controlled without unusual tipping or dragging.
Inspect the areas that players, coaches, installers, and maintenance staff may touch. There should be no burrs, exposed sharp metal, loose padding, protruding bolts, unstable covers, or pinch hazards created by normal operation. Record test conditions rather than reporting only “passed.” A repeatable movement and contact check makes the basketball stand inspection useful for supplier correction and future orders.
Use a risk-based release checklist
Classify findings by their effect on safety, function, durability, and presentation. A critical issue may involve structural integrity, falling components, severe instability, or a required safety feature. A major issue may affect alignment, adjustment, rim attachment, padding, or reliable daily use. A minor issue may be cosmetic and suitable for a documented concession if the buyer accepts it.
- Confirm the approved model, configuration, dimensions, accessories, and installation method.
- Check base stability, ballast or anchors, wheels, locks, and floor contact.
- Inspect uprights, braces, support arms, welds, plates, fasteners, and adjustment parts.
- Review backboard condition, mounting points, rim roundness, rim attachment, and padding.
- Operate movement and adjustment features under documented conditions.
- Record sample number, location, photograph, defect class, correction, and recheck result.
- Decide release, concession, correction and reinspection, or shipment hold.
Before purchase acceptance, use the basketball stand inspection record to reconcile the sample, accessories, carton markings, and approved changes. A mismatch should remain on hold until the supplier provides correction and the affected feature is rechecked.
Control packing and repeat orders
Packaging protects the inspection result during delivery. Review carton strength, edge guards, separators, padding, hardware bags, assembly instructions, labels, and pallet stability. Check whether heavy bases can shift into backboards or support arms during transport. Photograph representative packed units before loading and reconcile carton quantities with the packing list.
Save the completed basketball stand inspection with the approved sample, drawing, photographs, corrective action, and supplier version. Require written approval before the factory changes steel, weld sequence, fasteners, backboard, rim, padding, coating, ballast, anchor parts, or packaging. On the next lot, use the same inspection logic and compare both unchanged features and approved changes.
For final release, the basketball stand inspection should show that safety-critical findings are closed, evidence is attached, and the approved configuration matches the shipment. This gives buyers a clear basis to release the order, request correction and reinspection, or keep the shipment on hold.
Conclusion
A disciplined basketball stand inspection connects stability, structural safety, user contact, packaging, and repeat-order control. Check the base first, then review the frame, welds, hardware, backboard, rim, padding, adjustment system, and packed condition against an approved reference. When every finding has a sample number, risk class, photograph, and release decision, B2B buyers can communicate with suppliers clearly and reduce avoidable safety claims.